Downgrade from iOS 6 to iOS 5.1.1 (link to iOS 5.1.1 for the iPhone 4s included)

So for many people the… inconsistencies of the new iOS maps application in iOS6 is a deal breaker. Not so much for me, but I know some people who travel for work a lot and are furious about it.

Apple doesn’t want you downgrading to 5.1.1 because of the removal of Google Maps and the YouTube app.

That’s not to say it can’t be done.

First you’ll need and iOS 5.1.1 ipsw file, which you can get directly from Apple (for now) here (that’s for the iPhone 4s, you’ll need to hunt around for links for other devices).

Backup your phone in iTunes (or with iCloud, which ever you can get to successfully restore – with iTunes you can get software that will let you recover data and pictures from the resulting backup file even if iTunes tells you it is corrupt).

Select Restore in iTunes while holding the Shift key on Windows, or Option on a Mac.

When it prompts you for the file to restore from, select the one you downloaded above, and wait for the restore to complete.

I’ll use a safari link to maps.google.com until google releases an iOS maps app, but then I never used maps on my phone all that much.

iOS6: Configuring Do Not Disturb without a Mac computer

Of all the features that Apple has added to iOS (other than multiple email accounts), Do Not Disturb was the top of my most wanted list. I’ve hunted through every iOS update or rumor post since iOS3 looking for it. Finally with iOS6, there it was.

As soon as I got iOS6 installed, I started trying to figure out how to configure it, looking at the limitations. I am disappointed. I have two main complaints with DND as implemented in iOS6:

  1. Scheduling is weak. I want to be able to schedule it like I can schedule alarms; different times on different days. During the week 10pm – 7am is fine, but on the weekends I want 11pm – 10am.
  2. Contact groups.

Now I am well aware that contact groups is not really a part of DND specifically, but how they are implemented definitely affects its usefulness.

I guess part of my issue is that I don’t buy into the whole “Cult of Mac” thing, and do not own every Apple product ever made. I have an HP laptop, I will be buying a Microsoft Surface tablet (though I do own an original iPad), about the only thing I actually use that is made by Apple is my iPhone.

This makes managing contact groups kind of a pain.

I use Gmail to manage my contacts, which cannot create or edit contact groups on the iPhone.

By default the only options you have for groups that can bypass DND is Everyone, No One, or Favorites (and All Contacts if you have iCloud enabled for Contacts, but what is the point of that?).

I don’t want to add people who might need to bypass DND to my favorites.

I’ve found plenty of information on how to set up contact groups if you have a Mac computer, but as far as I can determine if you don’t have a Mac computer, you’re going to have to use iCloud if you want contact groups.

Now if you only want to set up a list of people who can bypass DND, not a huge issue.

When you have hundreds of contacts, stored in Gmail, in Exchange, and maybe Yahoo or Hotmail too (yes there are people who use Hotmail), managing your contacts gets tricky.

I don’t trust Apple with my data. Maybe that’s because I’ve yet to be able to successfully restore from an iTunes backup, no matter what I try. Every single time I have upgraded iOS (major versions anyway), I have had iTunes tell me that the backup was corrupt or unreadable.

After the first time way back on iOS3 I moved all of my contacts to Gmail, and washed my hands of letting Apple shepherd any of my data. Luckily since iOS5, I’ve been able to restore from iCloud backups (suck it iTunes). I have no complaints with iCloud as of yet, but I still don’t trust it.

In my specific instance, it looks like I have no choice and am going to have to use it for my contacts. I will be exporting my contacts to VCard file weekly.
I just want to point out that it is possible to only use iCloud for a single group of contacts if you want to create one for bypassing Do Not Disturb. Maybe Apple will fix this at some point, but I kinda doubt it.

To get Do Not Disturb working the way you want it to, you have three basic tasks:

  1. Configure iCloud Contact Groups.
  2. Enable iCloud to sync contact groups on your iPhone.
  3. Configure Do Not Disturb.

Configuring iCloud Contact Groups

First, you need to export whatever contacts you want to use for a group to bypass DND, we’ll call it ‘Bypass’. I had all of my contacts in Gmail, so I just selected the ones I wanted, and exported them all to a single VCard file.

Now you’ll need to sign into iCloud and create a contact group called ‘Bypass’ (or whatever you want to name yours), and then import the contacts you want in that group:

Click to enlarge

  1. Once you are signed into iCloud go to Contacts, and click this red bookmark looking thing to show groups (it’s on the other ‘page’ when you first get to contacts).
  2. Click this to add a new group.
  3. Rename the group, and then highlight it to ensure that you import into that group.
  4. Click the gear to expose options.
  5. Click here to import the contacts you want in this group.
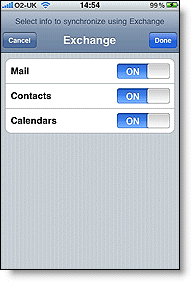
  6. To enable iCloud to sync contacts go to Settings > iCloud > Contacts (swipe to ‘On’).

Configuring Do Not Disturb

In my opinion Apple kinda dropped the ball on this one. Usually Apple’s UI is well thought out to the point of being so intuitive that someone who has never used an iOS device can usually figure out what they need to do to get something working, but Do Not Disturb (like several other things) is not exactly intuitive to configure.

Go to Settings > Notifications > Do Not Disturb.

Click to enlarge

Click to enlarge

Now that we’ve got the contact group we want to use configured in iCloud, we can select that in the Notification settings.

Click to enlarge

You can see here how I’ve configured my Do Not Disturb notifications:

Click to enlarge

One thing I would point out is that if you schedule DND you can still turn it on manually as shown in this screen shot. Also notice that there is a crescent moon icon that appears in the notification bar when DND is active:

Click to enlarge

It works pretty well, but I’d still like to see come changes to this in the next iOS update. Especially the ability to schedule DND a bit more granularly.

Admin’s Arsenal: iPhone Configuration Utility

Jesus holding iPhone I got an iPhone in 2009. I like it, it does what I need it to do. I’m not with the fanboi crowd that thinks that Steve Jobs was a saint, and the iPhone is the holy grail of cell phones. The thing has problems. The fact that I still cannot define a time that I do not want the phone to ring or vibrate, or only ring for specific callers (without jailbreaking) is pretty silly.

But it is still light years ahead of a Blackberry, and in my opinion far easier to use and maintain than an Android device.

All that aside, iOS is here, and our users want it. I’ve got about 10 users with iOS devices, and it’s spreading. I do not support enough mobile devices to justify a Mobile Device Management solution, but that doesn’t mean that I am forced to manage them all by hand either.

Some time ago Apple released the iPhone Configuration Utility (available here for both Mac and Windows computers), designed for exactly my use case.

You’ll notice that Apple has quite a bit of information available at that link, including an MDM solution specifically for iOS devices (which unfortunately is OSX only). Not bad, I’ll tip my hat to Cupertino on that, they aren’t ignoring the Windows people (for once).

The iPhone Configuration utility allows you to define profiles and configure settings for iOS devices (it works fine with iPads).

Let’s take a look at the interface (click the image to see the full size versions):

iPhone Configuration Utility interface

iPhone Configuration Utility interface


Note at the bottom there the setting to control when the profile can be removed from the phone. I would suggest that you choose the “With Authentication” setting, as you never know when you might need to remove the profile, and you don’t want users screwing around in there and accidentally removing the security policy requiring a passcode for compliance reasons (or just general security). Speaking of Passcodes:

Passcode policy

Passcode Policy settings


You can see here that you’ve got pretty granular passcode settings available, which is great because if Apple is known for doing one thing right, it sure isn’t security. If you happen to be in an environment where you need to disable certain settings, the Restrictions policy settings have you pretty well covered:

Restriction Policy Settings

Restriction Policy Settings


Which is great if you need to control things like disabling Siri when the device is locked. The utility also gives you the ability to define Wi-Fi networks that the iOS device is allowed to connect to:

Wi-Fi Policy Settings

Wi-Fi Policy Settings


This is actually pretty handy, you don’t need to give out wi-fi passwords, and you can isolate mobile devices as needed. If for some strange reason you want to allow users to connect their phones to your VPN, there is provision for that as well:

VPN Policy Settings

VPN Policy Settings


This is great for me personally, as I can use this to allow secure connection to our Spiceworks install, as well as remote desktop for emergencies. And of course we need email:

Exchange ActiveSync Policy Settings

Exchange ActiveSync Policy Settings


Pretty standard stuff from here out.

Here’s how I use this:

I have one company wide device security policy that gets installed on all devices. This is basically a passcode and screen lock policy that also disables Siri when the phone is locked. These are company devices, with confidential company information on them. I know it’s inconvenient for you to have to enter a 4 digit passcode when you want to use your phone, but tough. Don’t like it? I’ll remove it when there is no longer any company data on the phone, and that includes email and contacts that have employee’s home contact information in them.

I have one email profile that is basically a shared contacts box that get’s installed on every device.

Each user has an email policy that configures access to their work email.

I have a VPN profile that allows me to VPN into our network from my phone, but no one else has this capability.

This is great because in the 3+ years I’ve had an iPhone, I’ve had to replace or wipe the device at least 10 times. They’re not the most hearty of devices (that crown is still held by the mighty BlackBerry, which I know from experience can survive being thrown from the second floor of a building into parking lot during a torrential downpour), and water is like antimatter to them.

Now when I need to change hardware, or reload the device I simply email the four profiles to myself, and bingo all of my email settings are squared away in seconds (iCloud makes this super easy anyway, but it can take a while to get it working).


How to use Gmail to manage contacts on an iPhone

When I first moved to an iPhone, I lost all of my contacts after an update to iOS (good old iTunes and its corrupt backups). I had just gotten the phone, so there were not many contacts to lose, and I had them backed up in an excel spreadsheet. But I learned not to ever trust Apple with my data.

After doing a little bit of research, I discovered that I could use Gmail to manage my contacts, which is a great solution because it integrates with iOS 4+ really well and also because it gets my contacts online.

This is optional, but if you already have contacts in your iPhone you’ll want to import them into Gmail. Unfortunately the easiest way to do this is using iTunes (after this is done if you have iOS 5+ installed you’ll only need iTunes to sync music and ringtones).

You can use iTunes to upload existing Contacts from your Apple device to Gmail. Only the following information can be uploaded:

  • People’s names and job titles
  • Company names
  • Email and postal addresses
  • Phone numbers
  • IM names, including the type of service
  • Notes

Other information, like custom ringtones and photos, are not uploaded. Please sync them to Outlook first.

Contact Upload Instructions

  • Connect your iPhone, iPad, or iPod Touch to your computer using the USB cable.
  • Open the iTunes application.
  • Select your iPhone and click the Info tab.
  • Check the Sync Contacts with option and select Google Contacts from the drop-down menu.
  • Click Configure and enter your Google username and password.

  • Press Apply to sync your device with iTunes.
  • Once you’ve checked that your contacts are available on the web, disable iTunes Contacts sync with Google. If you don’t do this, you’ll see duplicate contacts on your phone.

Now that you have your iPhone contacts in Gmail, you can setup Gmail using an Exchange connection and specify that account for default contacts creation.

Getting Started

1. Open the Settings application on your device’s home screen.
2. Open Mail, Contacts, Calendars.
3. Press Add Account….
4. Select Microsoft Exchange. iOS 4.0+ allows multiple Exchange accounts. However, if you’re on a device that doesn’t let you add a second account, you could also use CalDAV to sync Google Calendar and IMAP to sync Gmail.

settings mail calendar contacts on iphone  add mail calendar contacts account on iphone  microsoft exchange

Enter Account Info

5. In the Email field, enter your full Google Account email address. If you use an @googlemail.com address, you may see an “Unable to verify certificate” warning when you proceed to the next step.
6. Leave the Domain field blank.
7. Enter your full Google Account email address as the Username.
8. Enter your Google Account password as the Password.

Notes about passwords:

9. Tap Next at the top of your screen.
9a. Choose Cancel if the Unable to Verify Certificate dialog appears.
10. When the new Server field appears, enter m.google.com.
11. Press Next at the top of your screen again.

exchange domain  exchange server

Enable Mail and Calendar

12. Select the Google services (Mail, Calendar, and Contacts) you want to sync. To receive and respond to meeting requests on your device, both Mail and Calendar need to be turned on, and New Invitations needs to be enabled in your Google Calendar settings.

To enable New Invitations, sign in to your Google Calendar using the web browser on your phone or computer. Go to Calendar Settings > Calendars > Click on the Notifications for the calendar you want to sync. Under Email check New Invitations (and any of the other Invitation settings you want enabled), and click Save.

13. Unless you want to delete all the existing Contacts and Calendars on your phone, select the Keep on my iPhone (or iPad or iPod touch) option when prompted. This will also allow you to keep syncing with your computer via iTunes.

If you want to sync only the My Contacts group, you must choose to Delete Existing Contacts during the Google Sync install when prompted. If you choose to keep existing contacts, it will sync the contents of the All Contacts group instead. If there are no contacts on your phone, the latter will happen — the contents of your All Contacts group will be synced.

iphone exchange mail calendars contacts  exchange keep on my iphone

Set Gmail as the default account for new contacts

To do this, select Settings  >  Mail, Contacts, Calendars  >  Scroll to the Contacts Section  >  Default Account  >  Change FROM On My iPhone TO (whatever you named your Gmail account).

Now, whenever you create a contact on your iPhone, it will automatically sync to Google!

Siri-ous vulnerability in default iPhone 4s configuration

So like many people, I got an iPhone 4s shortly after launch. It wasn’t totally gadget lust, I have iPhone users to support at work, and they have started upgrading to the 4s (deployed the first one today).

Turns out it’s a good thing I got one a couple of weeks before any of my users.

I keep my phone locked with a passcode, but with Siri enabled, that doesn’t mean the phone is secure.

There is a setting in iOS 5 phones with Siri enabled (at this point only the 4s) that allows Siri to be accessed while the phone is locked. This is a feature not a bug. With this feature enabled anyone who picks up your locked iPhone 4s can send email, text messages, make calls, even screw with your calendar. The potential for shenanigans is only limited by how well the unauthorized user knows Siri.

I was able to set an alarm for 3AM with the phone locked, so I can only imagine what someone that really knows how to use Siri could get up to.

Unfortunately Apple decided to set this to enabled by default. Apparently impressing your buddies is more important than securing your phone, even if you thought you had secured your phone by enabling a passcode lock.

Fortunately it’s a setting, so you can disable it. To do so, go to Settings>General>Passcode Lock, and turn the Siri setting to Off.

This means that you can’t use Siri when your phone is locked, but then neither can anyone else. I’m disappointed that Apple hasn’t yet made taking security seriously a priority, it would have been so easy to avoid this potentially serious security breach.